Buttons
BG Editor version 2.1
Material support version.
Usage:
When starting, to choose either 'SingleSize' or
'DoubleSize'.
In 'DoubleSize', Map chip will be displayed
at double size,
but editable area will be
narrow.
Since it also supports double density
material(1parts=32x32pixel),
when treating the
material with 32 as a basic part,
please select the
item (32) below.
The editing, place the upper BG-graphic-area by selection
from the graphics buffer below.
By USB or Bluetooth Mouth
use, This program will be comfortable.
It can scroll in four directions at the touch of
4-way.
And, by flicking the right blank part on the
screen,
It's possible to make a screen scroll about each
upper and lower frame.
(In width-resolution 800 or less
machine, there is no right blank)
All treated files are under current folder's,
please run editor after current folder is chosen first.
Buttons
FILE it becomes the next selection.
Buffer Load
To select ".png"
data file to read in Graphic buffer. (e.g.: dg1.png)
It's loaded at the current cursor(yellow) position.
Material Load
Material list is
displayed, and please choose by tap.
It's loaded in
the current cursor(yellow) position.
BGMap Load
BG map data is chosen from [.dat .map .bg .bin] files.
(e.g.: dm1.dat)
At first, the scale size of BG
graphics is inputted in order of X and Y.
(X*Y must
be 256screen and fewer.)
BGMap Save
File name is
inputted and BG map data is saved.
Buffer Save
File name is inputted and Graphic buffer(map chip
pattern) is saved.
BGMap clear
BG map data is cleared.
The scale size newly be edited is inputted in order of
X and Y.
Buffer clear
Graphic Buffer is cleared.
End
Exit the editor.
FUNC it becomes the next selection.
Copy from Map
To select
parts pattern area that is drawing source from 'BGMap' itself.
At first, let it scroll and adjust so that
'upper left of pattern' come to 'upper left of BGMap
view frame'.
Next, to select this 'Copy from Map'
from menu to input lower right coordinate.
Please
see the coordinate scale, and
to input numerical
value by keyboard in order of X,Y.
With this, the
selected area will become a drawing pattern.
Replace
To replace the
pattern of 'BGMap' inside.
This also use the upper
left corner of view frame.
At first, let it scroll
and adjust so that
'upper left of change after
pattern' come to 'upper left of BGMap view frame'.
(or draw 'change after pattern' to upper left place
0,0)
Next, to select the pattaern(area) of 'change
before' from 'G-buffer' or 'BGMap'.
(if 'BGMap'
scrolled, please let 'change-after-pattern' back to upper left position)
And, select 'Replace' from menu, to enter
coordinate(lower right) input mode of 'after-pattern'.
To input the coordinate with the same way as 'Copy
from Map'. After input, replace is performed.
Even
if 'Before' and 'After' size are different, replacement is possible.
Free draw > X-Line > Y-Line
It assist so as not to be blurred when drawing a
straight line.
Whenever push this item, the 3 mode
are switched turn.
When 'X-Line' mode in drawing to
trace horizontal,
be assisted so as Y-axis is not
be blurred.
'Y-Line' mode is assisting of vertical
drawing.
Paint
To fill 'BGMap'
portion enclosed by any chip pattern.
At first, to
enclose the area to fill by any pattern, so that there are no clearance.
Next, to select a pattern to fill from G-buffer, and
select 'Paint' from menu.
since a message is
appeared as to select place,
please tap the center
point of fill from 'BGMap'
The point's pattern =
fill area, other patterns = boundary, as it,
paint
is performed.
Align32
When regard '32 size
= 1 block' and edit it, but in 'Paint',
fill is
performed by 16 size parts single.
In 4 parts
contained in 32 size, perform paint with this upper left 1 parts,
And perform this 'Align32', the remaining 3 parts is
drawn by correction.
Whole Map will be redrawn like
the 32 size block painting.
The groundwork that
parts number is 0, there area will not be processed.
(It has prevented that the 0-groundwork is destroyed,
and second paint disable)
HELP
Show this bged
manual.
REV
It can switch between
[0.NoReverse 1.Xreverse 2.Yreverse 3.
XYreverse] in
the 'rev' button on the right.
It is valid when the
parts size is 16.
16/32
To switch the parts
size between 16/32.
At select 32, the unit of the
movement will be also 32 units.
RANGE
Free select the
selected region (parts size).
Start point and End
point, please choose the 2 points by tap.
It's
possible to choose by scroll combination.
For the case if it is difficult to select with the
tap,
another selection method has been
prepared.
Made to move to upper left corner, at
chosen the parts.
And touch [SEL] button. This will
be the selection it.
Both the start pos and end
pos, it can be selected by this method.
PASTE
It paste the selected
pattern to any position of Graphics buffer.
Please
tap the paste place from the under area.
Graphic
buffer can be edited by these 2 sets.
UNDO
To back from
immediately drawn one(Map-chip) to before state.
Graphic-buffer pasting one and the 'BGMap' rewriting
by 'Func-menu' also,
able to back by this [UNDO]
button.
Old version 2.0
Old version 1.51
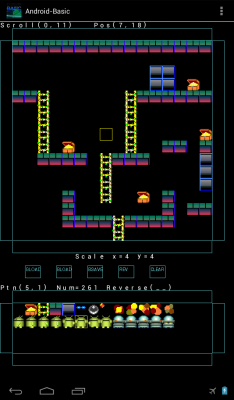
WVGA 480x800
600x1024 or more. Vertical screen only.
Usage:
The editing, place the upper
BG-graphic-area by selection from the graphics buffer below.
It can scroll in four directions at the touch of 4-way.
It can switch between [0.NoReverse 1.Xreverse 2.Yreverse
3.XYreverse] in the 'rev' button on the right.
Gload: To
select ".png" data file to read in Graphic buffer. (e.g.: dg1.png)
Bload: BG map data is chosen from [.dat .map .bg .bin]
files. (e.g.: dm1.dat)
(It can add the available
extension in 710 lines)
At first, the scale size of
BG graphics is inputted in order of X and Y.
(X*Y
must be 256screen and fewer.)
Bsave: File name is
inputted and BG map data is saved.
Clear: BG map data is
eliminated.
The scale size newly be edited is
inputted in order of X and Y.
Old version 1.3
HVGA mini screen, Horizontal screen support. Reduced
display.
It can switch the virtual input device in the
'inp' button on the right.
Trigger1: Placement.
Trigger2: It can switch pointer of upper and lower frame.